John Free’s “FIVE Fs SYSTEM” | Street Photography Tips
 Follow
John Free’s “FIVE Fs SYSTEM”
Street Photography Tips on finding, figuring, framing, focusing and firing.
 John Free’s Street Photography Tips, the “5 Fs System” (finding, figuring, framing, focusing and firing), was conceived to help photographers remember the things to consider, when photographing a subject in real life situations. If you practice this system, it will become your working technique as a street photographer.

1st “F”: FINDING
Finding a subject can be a frustrating process for many photographers. Subjects are everywhere. The eyes are not too important when searching for subject. The eyes are just part of the tools we work with. It is the vivid imagination that finds the subject by noticing and evaluating various details, which are a part of the subject area – the photographer frames these various forms to make an effective photograph.
The subject itself is not the most important thing. What the photographer does with the subject is the supreme test.
A walk to the store will never be the same for the sensitive photographer, the mud puddle at the corner will provide a myriad of visual possibilities that can keep a photographer busy for hours. The reflections in the puddle, the passing wheels of cars, the feet walking by, the cop directing traffic – all these and much more will facilitate the imagination to construct stimulating photographs.
Combining the smallest insignificant detail with other insignificant details can result in a significant photograph. These details, elements and factors are lying around everywhere for the attentive photographer to collect into an image that has the power to create an emotionally moving photograph. Henri Cartier-Bresson said, when asked how to do it, “It’s all in the details.”
Studying the photographs of Henri Cartier-Bresson, Robert Frank and Gene Smith will demonstrate that their photographs always had at least three things, or factors, that they considered and then combined to make a wonderful photograph.
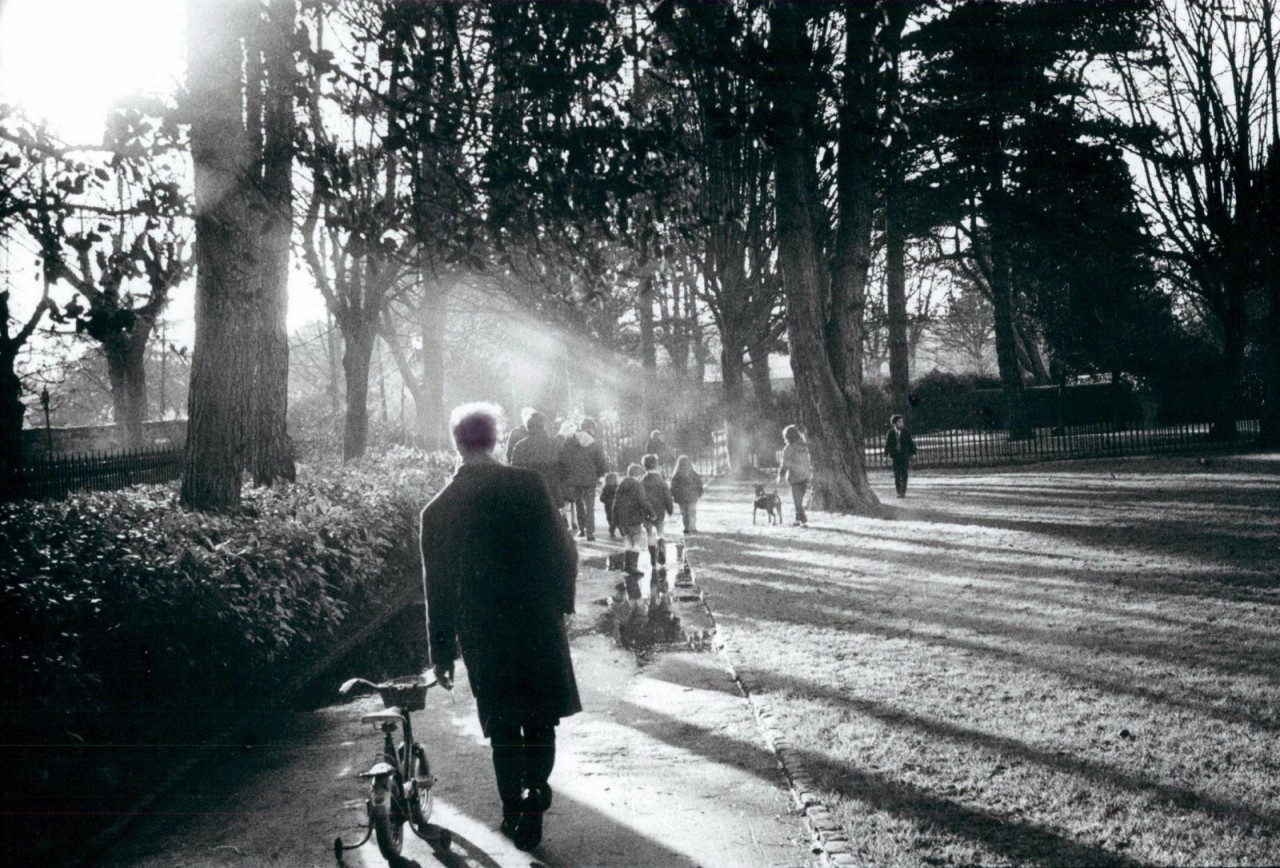
For example, in the photograph above the first thing, I noticed, was the tender scene of the father, bringing the bicycle along as the children ran ahead. They ran ahead into their lives and dad was there to give support and guidance. The light and atmosphere at the day’s end was combined with the details that were needed to complete the visual story. The focus was placed on the bicycle, which to me, was an important aspect of the image. The slanting light was emphasized to show that the day was ending and the people were headed home.
2nd “F”: FIGURING
Hooray! You see a situation or subject that you think will make an exciting photography. Now what?
Throughout a subject area, there are many elements, factors and details that when effectively combined in the photograph, help give the center of interest more strength. The only difference between the average photographer and Henri Cartier-Bresson is that Bresson considered every detail and he only included those that would enhance the center of interest and he excluded those that would detract from it.
To figure this out you must take an instantaneous visual inventory of what you have to work with and then you must consider which to include and what to eliminate. Ideally you will include at least three things to put together with the center of interest that will strengthen the photograph.
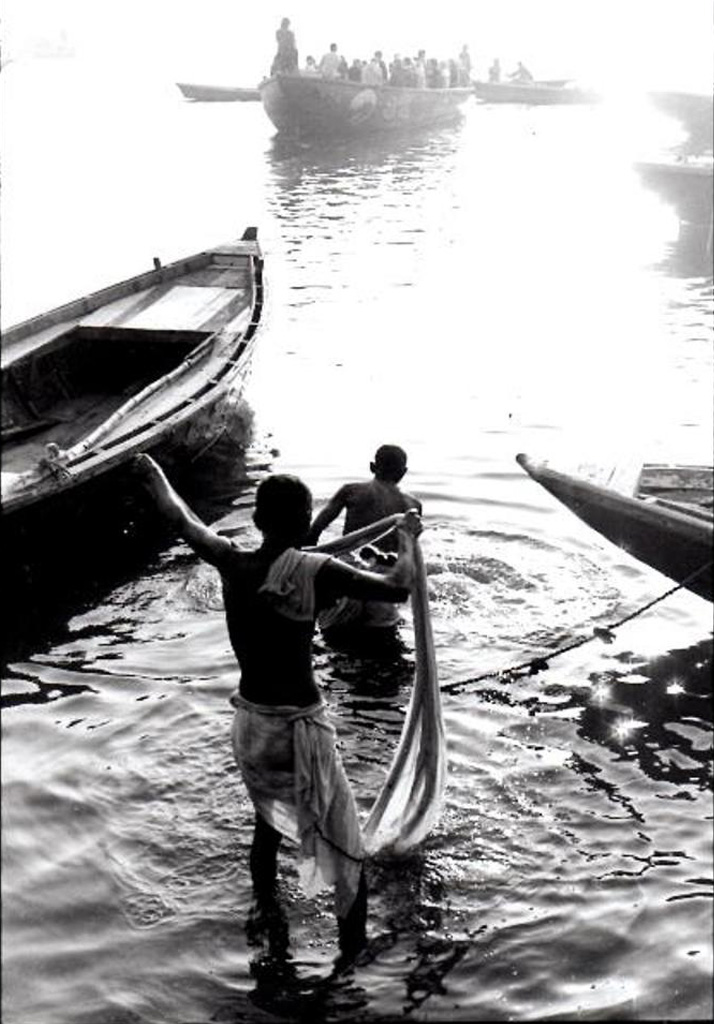
For example, when I saw the two boys in this photograph I realized they would be a great subject because of their movements and their excitement about bathing in the Ganges at dawn. I knew that there were other important details, such as the empty boats in the foreground, the crowded boats and the lighting, that I wanted to include. I wanted to emphasize that it was dawn so I wanted to show the light on the water which would give the photograph a mysterious quality. I also knew that moving in close to the boys was the most important thing of all so I eliminated parts of the boats. I also thought it important to include the boats in the background that were crowded with the people as a contrast with the two boys in the water. I chose the vertical format, so all three elements were visible and I positioned myself, so that the boys were the center of interest and were between the two boats in the foreground and the crowded boat in the background was still visible.

Framing is the action of putting all the elements, factors and details together in a way that gives the center of interest its most strength. Framing is dictated by the second “F”, which is figuring.
Framing really is the act of putting it all together for the finished photograph.
Someone once said that there is no composition, only facts. For me, this concept makes framing much easier. I do not learn much from the word “composition” and how it applies to an effective photograph. I do not get a mental picture of anything from the word “composition”. Noticing and using these facts, or details that are always present in the subject area, is a method that I use to arrive at an effective photograph.
The subject can only be framed precisely if the camera’s viewfinder covers 100% of the desired subject, including the effective use of all the details. Many cameras only show about 95%, which means that the image will contain 5% more in the photograph than the photographer intended, so the image must be cropped later in the printing process if using film, or digitally if using a digital camera. I do not like to crop so I try to be very careful framing the shot. That’s why I prefer the Nikon F-3 which shows 100% in the viewfinder.
The object is always to get as close as possible to the center of interest. Getting in close is one of the biggest challenges in social documentary, or street photography. Remember, that the photograph is always for others to enjoy and learn from. One way to get in close, but still use important details, is to use only a part of each detail.
For example in the color photo below, I can be seen in action, getting in close and using a vertical format to include the details that I desired in the photograph. I intentionally framed the photo to not show the man’s head, so that I could move closer to the center of interest which is the hand and cane. The boats in the background are out of focus, which places more emphasis on the hand, cane and clothing.
4th “F”: FOCUSING
Hocus pocus they took away the focus?
I believe that the focus should be on what the viewer should see first. For many years, the average photographer has not had to think about focus. That control was taken away from us with the introduction of autofocus. If you study the work of renowned photographers’ photos you will find that focus plays a big part in guiding the eye of the viewer to a spot in the subject area that the photographer wanted. The focus was placed on a spot in the subject area, which made the most sense to the photographer at the time after considering many elements, factors and details that are a part of every subject. With autofocus, it is difficult for the camera to know, where the photographer wanted the focus to be placed for the best effect.
My technique has changed very little over the last forty years. I have used many types and sizes of cameras, but the type I prefer for street photography is the manual SLR. This type of camera offers me a very accurate view of the subject in the viewfinder. The view shown in the viewfinder is made through the lens itself to give an exact picture of what the lens sees.
Another very valuable aspect to the viewfinder of an SLR is the ability for me to focus anywhere in the viewfinder. Many cameras have the focus area only in the very center of the viewfinder and to accurately focus, the camera must be pointed at the spot desired and then reframed to make the shot. There is no time for that, when photographing at the speed of life.
Many of my students had no knowledge of this “off center” focusing and that it could be done at all. When they understood and practiced this option, they were grateful for the information, because now they had learned a new way to control the effect of their photograph by the use of accurate off center focusing.
Reframing is another function that must be made, when there is very little time to make the shot. My technique is to focus as I am framing, always adjusting the focus on the center of interest, as it is always moving and constantly changin,g as the world whirls before us. Quick, quick, we must be very quick and place the focus where it will do the most good.
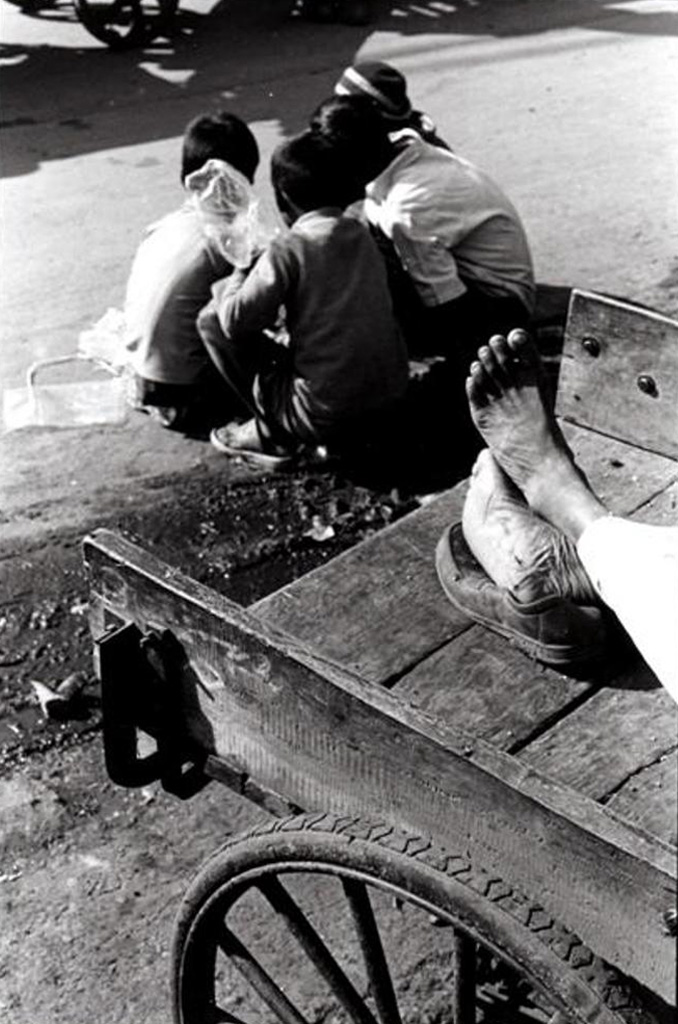
In this photograph, I noticed the relationship between the toes of the man in the cart with the boys, who were also lined up like the toes. To emphasize the toes, I placed the focus on them, without having to move the camera to focus off center. I also included in the frame the wheel, which gives the viewer added information and at the same time there is a further relationship with the spokes of the wheel and the toes and the boys. With my Nikon F-3 film camera, I was able to manually focus on the toes without changing the framing by focusing off center to the right in the viewfinder.
5th “F”, FIRING
Everybody wants to hear the click.
That expensive and precise sounding click. The sad part is that most of the time the camera is not ready to make the photograph when the mind commands it to. The photographer is still thinking or adjusting the camera and misses the shot. The hands cannot keep up with the brain. Is this a case of fumbling and bungling?
Be hard on yourself, if you are being self-taught. You should know that even being late for ½ second and the shot is lost. The photo might come out okay, but it is not the shot your brain decided on and you missed because of slowness on your part. Slow aesthetically and slow mechanically. Sad but true, as I have seen it over the years in many photographers including myself. When the brain is working well and fast and the hands can keep up, that is when the effective photographs emerge from inside the photographer. When everything is thought about and adjusted, the camera seems to go off by itself.
Taking many shots to get one good one can be very dangerous. Many photographers shoot, shoot, instead of concentrating on the subject with all its variables and being ready to coincide with the most effective instant, when it all makes sense to the attentive and dedicated photographer. The digital camera allows the photographer to make hundreds of shots without having to buy expensive film. This is one reason that I advise photographers to go back to film. Thirty six shots of expensive film might make the photographer think more and shoot less.
O.K. now you can push the button.
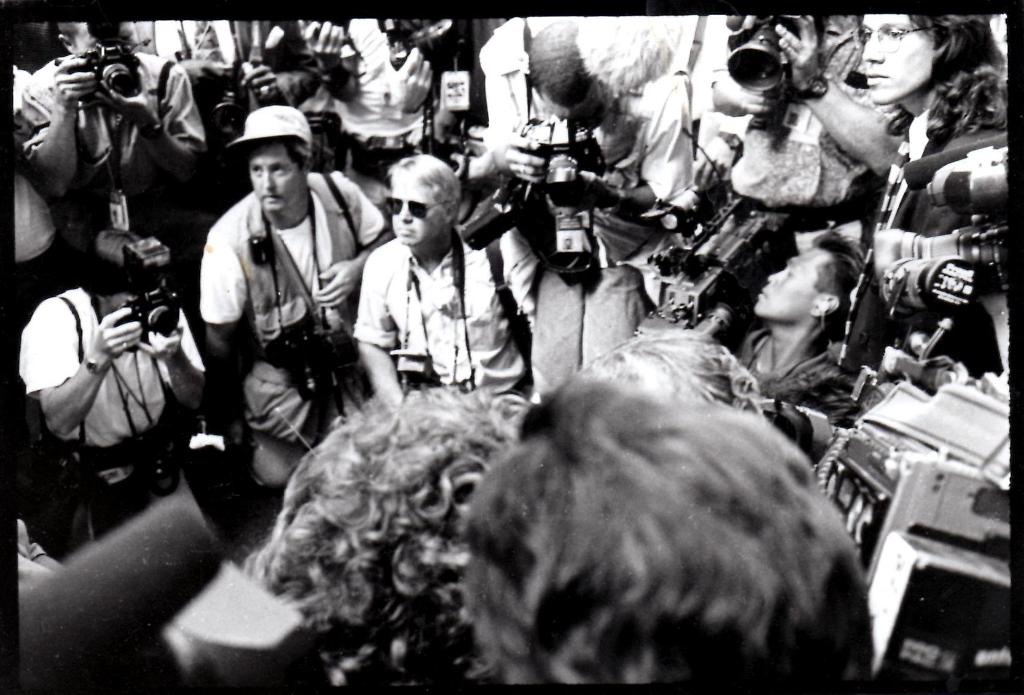
I am using this photograph as an example of the figuring, framing and focusing that I thought were effectively adjusted, so that I was ready to take the shot at the moment, when the two people in the background were starting to shake hands, which I felt was a symbolic gesture.
Find more information at the authors website John Free Photography
And read more interesting posts about Street Photography in our blogs and forum.